3.3. Tenants
In this chapter we will create our first tenant. All of the configuration will again be done in your Backend (port 8443 HTTPs).
3.3.1. Setting up your first Tenant
Open your browser and connect to the Security Center
Backend. After logging in with your administrative credentials,
navigate to Tenants and click Add Tenant in the top
right corner.
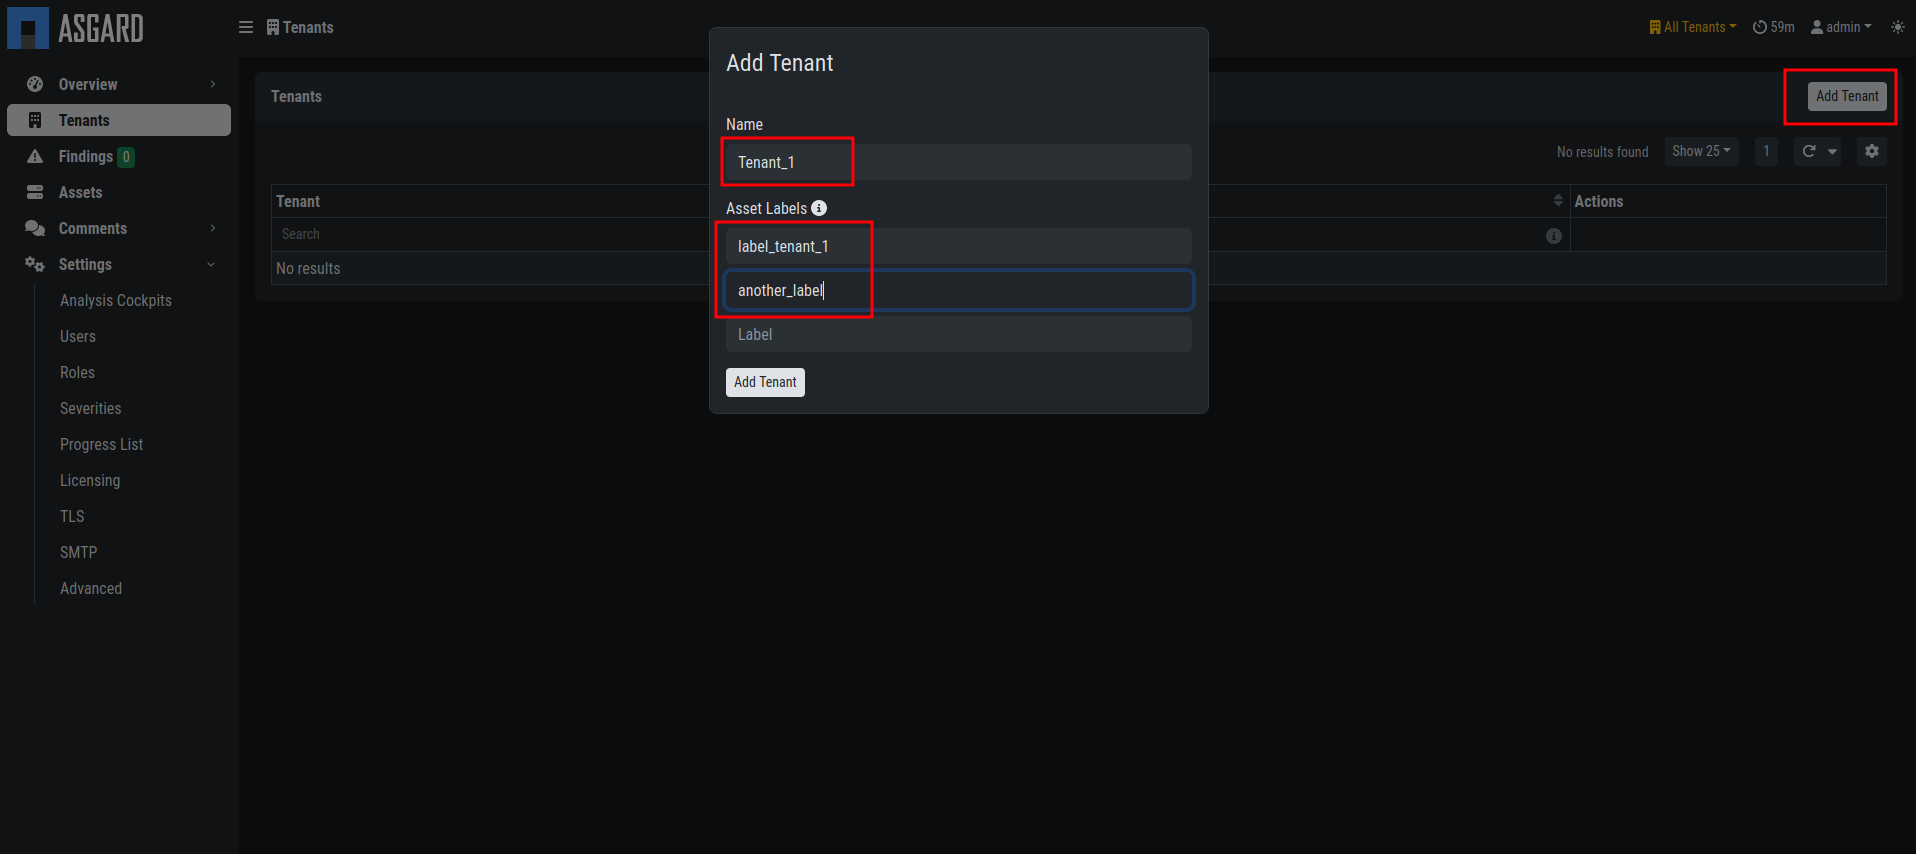
Security Center new Tenant
Choose a Name for the tenant and the Asset Labels
associated with this tenant. The labels are used to assign
assets from the Analysis Cockpit to a tenant. An asset will
be assigned to a tenant, if it has at least one of the labels
selected.
You can always modify the labels for a tenant by clicking the
Edit button in the Actions column.
Danger
It is important to understand that an asset is assigned to a specific tenant the moment it first shows up with a label that fits to this specific tenant. Changing the label at a later point will NOT cause the asset to be assigned to another tenant.
Hint
To automatically assign assets to the correct tenant, service providers can create a tenant specific agent installer (on the ASGARD Management Center) with a preset and unique label for every tenant. This agent installer can be provieded to the specific tenant for installation.
3.3.2. Create a User Group for your Tenant
You can create an optional User User Group for the
Security Center. This can be used to assign to non-administrative
users of the Security Center. Individual Users will be assigned
to a tenant with those permissions.
To do this, navigate to Settings > Roles and click
Add Role in the top right corner.

Security Center User Group
3.3.3. Create a User for your Tenant
You can find all the users in Settings > Users. Here you
can create new users for your tenants. You will also find the admin
user, which is assigned to All Tenants. Create a new user
by clicking Add User in the top right corner.
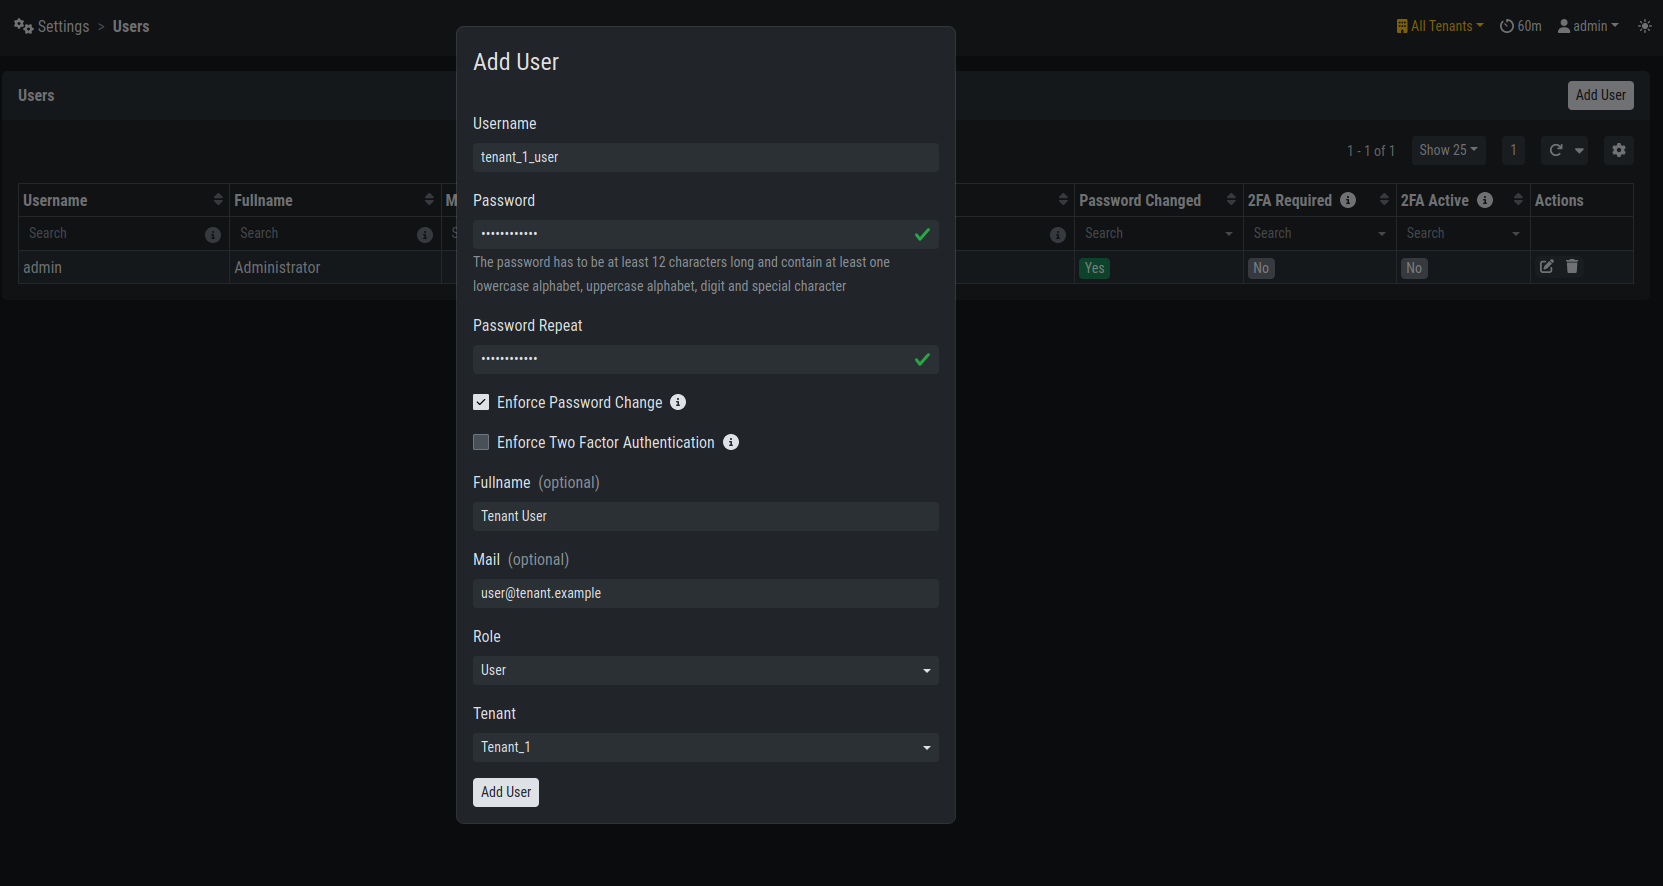
Security Center new User
Make sure to use the correct role and tenant for this user, as this will determine what the user can access.
Hint
Currently you can only create normal user accounts for a tenant. In future version you will be able to create tenant-specific administrative accounts, which will be able to create users for their own tenant.
The tenant users should use the Security Center Frontend to access their data. See Customer Access.